When you send in your audition tape, you want it to stand out above all the others. This is no easy feat in such a competitive industry, especially when there could be hundreds of other performers hoping to audition for the same role. In this article, we’re going to give you some helpful tips to ensure that your audition tape is as effective as it can possibly be so that we can help increase your chances of landing that audition you so badly want.
WHAT IS A SELF-TAPE?
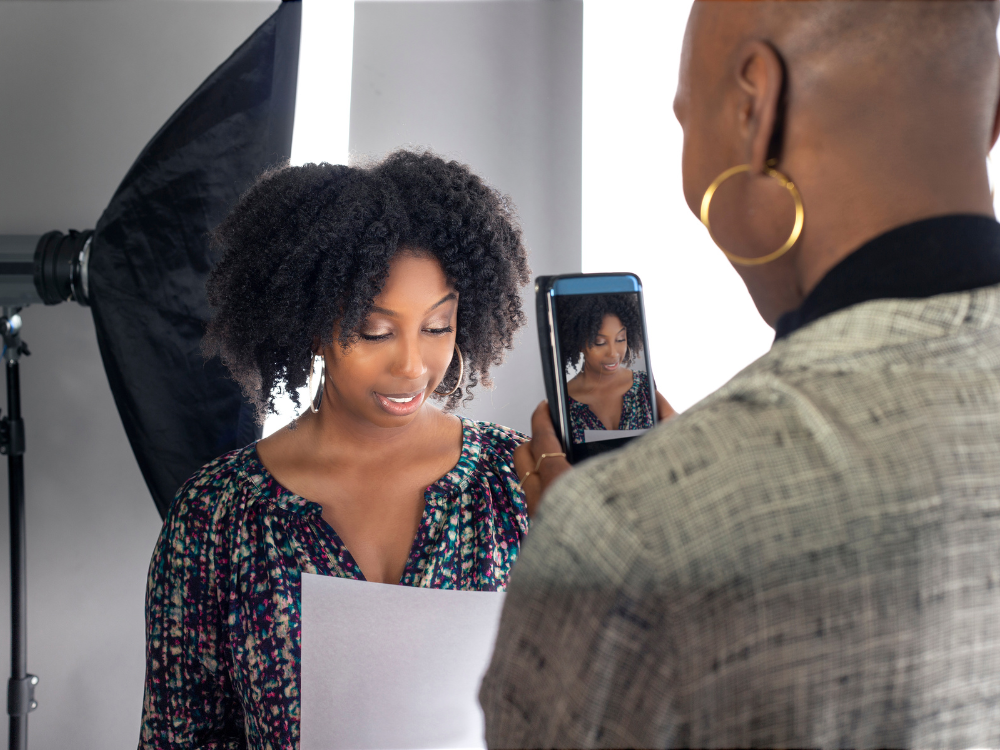
A self-tape is a video you make yourself at home. It should be recorded close up to you, and it should demonstrate your abilities as an actor. It should show the audition panel your compatibility to play the role you’re auditioning for. A self-tape is used when you are unable to make it to an audition in person.
CHOOSE A GOOD CAMERA
If you’re working on a budget and just starting out in the industry, using your phone camera is okay. Eventually, you’ll want to consider investing in other equipment, such as a better camera and methods of lighting, but for now, a camera phone will work just fine. Make sure you follow our important tips, though, for making the most out of your camera phone’s abilities.
PLACING YOUR CAMERA PROPERLY
Your camera should be nice and stable before you film your self-tape. If you’re using your phone, you can wrap some rubber bands around it and stabilize it using some books and a high piece of furniture. You can also check out small tripods online; some of them are under $25.
Make sure your camera rests securely at eye level. The main focus should be you, and the camera should be filming you at a medium close shot, with the top of your head and middle of your chest showing. You want to be able to move around a bit when you need to while keeping your actions grounded and looking real.
Make sure the camera is not too close, is not off centre, and not focused too low or too high on you.
MAKE SURE YOUR LIGHTING IS JUST RIGHT
Natural light is your best option for lighting your self-tape. Anything too harsh will wash out the video and create harsh shadows on the wall. If you want to invest in some reasonably priced lighting, you can find small or big LED lights, box lights, or ring lights online.
CHOOSING THE RIGHT BACKGROUND
Find a flat wall that’s free of paintings or anything else that might clutter up the shot. You want a light coloured, even background. You can use a neutral curtain if you are unable to find a wall that fits this description. Make sure there is no background noise either.
OTHER TIPS AND TRICKS
-Don’t try to create a setting or film on scene
-When you’re reading, don’t look off stage or film yourself in profile
-When using a reader, make sure they are not too close to the camera’s microphone or off to one side so that you turn to them.
-Position your camera close enough so that the microphone can pick you up clearly. You might want to consider investing in a lapel mic.
Well, that’s about it! We hope that these tips were helpful and that you’re ready to start recording your very own self-tape. Good luck!